Overview
Quick Build
Artifacts
Fragment of Harmonic Whimsy
4-Piece · Farmable
Sands
HP%
Main stat
Goblet
Pyro DMG%
Main stat
Circlet
CRIT DMG
Substats
CRIT DMG ≥ CRIT Rate > HP% > ATK%
Strengths
- High personal damage that isn’t reliant on specific combos
- Flexible teambuilding and rotations
- Not reliant on her Burst to deal damage
- Good early Constellations that front-load her damage
- Controlled off-field Pyro application helps with buff setups
Weaknesses
- Cannot rely on healers for survivability; personal healing is tied to a fairly high-cost Burst
- Vulnerable to interruption at C0
- Noticeable performance gap between her signature weapon and other weapons, particularly free ones
Talent Priority
Main source of damage or utility. Level to 10.
Level to 6–8 for meaningful gains.
Level to 6–8 for meaningful gains.
Level minimally or skip.
Substat Priority
Bennett and Furina provide particles. 130% ER is comfortable for consistent Burst rotation.
Fewer Pyro particles; aim for 140% or use a Sacrificial-wielding support to funnel.
Without a Bennett or second Pyro unit funneling, 150% ER is the safe floor.
Arlecchino does not need healers but does need consistent Burst uptime. Use funneling or ER% substats to maintain 130–140%.
Weapons
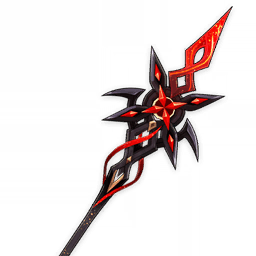
5-star Weapons

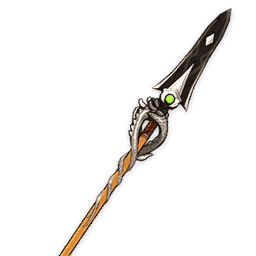
4-star Weapons

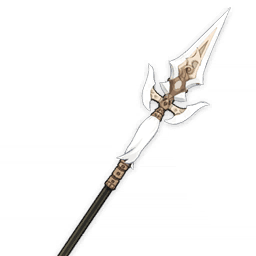
3-star Weapons
Artifact Sets

Sands
HP%
Goblet
Pyro DMG%
Circlet
CRIT DMG

Sands
ATK%
Goblet
Pyro DMG%
Circlet
CRIT Rate / DMG

Sands
ATK%
Goblet
Pyro DMG%
Circlet
CRIT Rate / DMG
Team Compositions

Arlecchino
Main DPS

Furina
Sub-DPS / Buffer

Kazuha
Support
Bennett
Buffer
The top Arlecchino team. Furina provides off-field Hydro for consistent Vaporize and a massive Fanfare DMG Bonus stack. Kazuha groups enemies and provides Pyro DMG Bonus. Bennett heals (not Arlecchino — she resists healing — but everyone else) and provides ATK buff.
On-field Pyro DPS. Marks enemies with Skill, uses Normal Attacks to build up Bond of Life and trigger Vaporize, then Bursts to clear Bond for ATK bonus. Furina's Hydro aura ensures consistent Vaporize on Normal Attacks.
Salon Members apply off-field Hydro for Arlecchino's Vaporize. Fanfare stacks from HP changes (Arlecchino's self-drain from Bond of Life) build a massive party-wide DMG Bonus of up to ~75%. Furina's self-damage from her Skill perfectly feeds Fanfare.
Swirl Pyro to provide +35–40% Pyro DMG Bonus via his EM-based buff. Also groups enemies for AoE efficiency and reduces Pyro and Hydro RES.
ATK buff from Burst and Pyro resonance. Bennett's healing doesn't affect Arlecchino (she resists external healing), but the ATK buff and resonance apply normally. Removes Cryo/Hydro debuffs via Pyro application.
Talents & Constellations
Talents
5-hit polearm combo. Arlecchino's primary damage source — these are the attacks she performs during her Bond of Life window to absorb HP from marked enemies. Level to 10; this is your priority.
Arlecchino charges forward and marks nearby enemies with Blood-Debt Directives. On Normal Attack hits, HP is transferred from the mark to Arlecchino, increasing her Bond of Life value. When Bond of Life is cleared (via Burst or natural expiry), she gains an ATK% bonus scaled to the Bond value. She cannot receive healing from external sources — this is core to her self-sufficient design.
Arlecchino performs multiple Pyro slashes, dealing massive AoE Pyro DMG. Each slash restores her HP proportional to her Bond of Life — she heals herself via the Burst. After the Burst, her Bond of Life is cleared and she gains the ATK bonus from A4. The Burst cost is 60 Energy and has a 15s cooldown.
Blood-Debt Directives left on enemies naturally expire and deal Pyro DMG after 5 seconds if not absorbed. Also, Arlecchino's Burst has its cooldown reduced based on Bond of Life value cleared. More Bond of Life = shorter Burst CD.
When Bond of Life is completely cleared, Arlecchino gains ATK% scaled off the Bond of Life value that was cleared (capped at 80% Bond of Life for maximum ATK bonus). This is the engine of her damage: clear Bond → get ATK buff → deal amplified Normal Attacks → rebuild Bond → repeat.
Constellations
Blood-Debt Directives and the All Is Ash damage gain +40% Pyro DMG Bonus. Also increases the AoE of Blood-Debt Directives. The Skill becomes more threatening to grouped enemies.
Is it worth getting?
Solid upgrade to Skill damage. Not a pull target alone, but valuable on the road to C2.
When a nearby party member consumes HP, Arlecchino's Bond of Life increases. Also, when a character's HP changes, Arlecchino gains stacks (max 3) for Fragment of Harmonic Whimsy-like ATK DMG Bonus. This pairs perfectly with Furina who consistently changes HP.
Is it worth getting?
The major pull target. The HP-change interaction with Furina teams is substantial, making Arlecchino's Furina Vaporize comp significantly stronger. Recommended for players investing in her.
Increases All Is Ash level by 3, boosting Blood-Debt Directive transfer rate and damage.
Is it worth getting?
Incremental upgrade. Assists Bond of Life building.
While Arlecchino has a Bond of Life, she resists interruption and gains +10% CRIT DMG. The interruption resistance is meaningful for difficult Spiral Abyss floors.
Is it worth getting?
QoL and minor stat boost. Welcome on the road to C6.
Increases Balemoon Rising level by 3, boosting Burst AoE DMG and self-healing.
Is it worth getting?
Direct Burst improvement.
After using Balemoon Rising, Arlecchino's Normal Attacks deal +700% ATK Pyro DMG on every hit for 10 seconds. This is an enormous on-field damage amplification that represents her maximum ceiling.
Is it worth getting?
Endgame investment. The +700% ATK Normal Attack DMG bonus is transformative. C2 → C6 represents the full Arlecchino investment path.
C0 is fully viable and clears all content. First stop: C2 (HP-interaction buff for Furina teams). Endgame target: C6. First stop: C2. Endgame target: C6.
Alternatives to Arlecchino
Not sure Arlecchino is right for you? Compare against other characters to find your best pull.

Higher Vaporize ceiling; more complex HP management. No self-sustain without Zhongli.

Higher overall ceiling with Natlan teams; requires specific teammates for peak performance.

Better in mono-Pyro teams; charged-attack focused; simpler kit.