Overview
Quick Build
Artifacts
Blizzard Strayer
4-Piece · Freeze teams
Sands
ATK%
Main stat
Goblet
Cryo DMG%
Main stat
Circlet
CRIT DMG
Substats
CRIT DMG > ATK% > CRIT Rate (Blizzard + Mistsplitter covers CRIT Rate)
Strengths
- Has on-demand, on-field Cryo application through her Alternate Sprint and Cryo Infusion
- Her free-to-play weapons perform close to 5-star alternatives and not far behind her signature
- Can flexibly fill downtime with her Cryo-infused Normal and Charged Attacks or swap to her teammates and activate their respective abilities
- Has good options for vertical investment into herself and her team
Weaknesses
- Loses a majority of her personal damage if her Elemental Burst misses
- Requires good Energy management and funneling to fund her Elemental Burst
- Relatively inflexible team compositions
- Her best artifact set options have conditionals which can make her tricky to build
- Her Alternate Sprint and Charged Attack can feel clunky to use
Talent Priority
Main source of damage or utility. Level to 10.
Level to 6–8 for meaningful gains.
Level minimally or skip.
Substat Priority
Shenhe's Skill generates Cryo Particles. Combined with Ayaka's own Skill, 135% ER is comfortable.
No Cryo battery beyond Ayaka herself. Needs slightly more ER or Favonius Sword support.
Venti's Burst infuses Cryo for particle generation. 140% covers consistent uptime.
Amenoma Kageuchi's Energy seeds and C2's Particle generation significantly reduce ER needs. Aim for consistent Burst every rotation.
Weapons
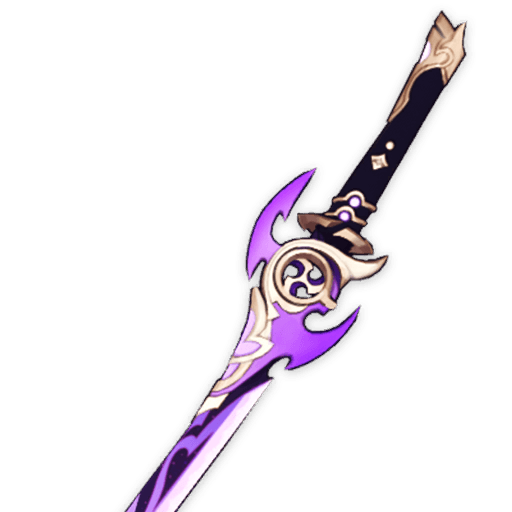
5-star Weapons

4-star Weapons
Artifact Sets

Sands
ATK%
Goblet
Cryo DMG%
Circlet
CRIT DMG

Sands
ATK%
Goblet
Cryo DMG%
Circlet
CRIT Rate / DMG
Team Compositions

Ayaka
Main DPS

Shenhe
Sub-DPS / Support

Kazuha
Support

Kokomi
Healer / Hydro
The definitive Ayaka team. Kazuha groups enemies and provides Cryo DMG Bonus. Kokomi provides consistent off-field Hydro for Freeze and heals. Shenhe buffs all Cryo DMG via Icy Quills. This team has been a top-tier Spiral Abyss composition for multiple years.
Sprints to apply Cryo infusion, then delivers chains of Cryo Normal and Charged Attacks while Frozen aura is maintained. Burst drops a tornado of Cryo hits — all amplified by Shenhe's Icy Quills and Blizzard Strayer's CRIT Rate bonus.
Icy Quills add flat Cryo DMG per-hit bonus to all Cryo attacks (Ayaka's Normal/Charged/Burst hits all benefit). Press Skill twice and Burst to distribute all stacks before Ayaka enters the field.
Swirl Cryo to provide the team +35–40% Cryo DMG Bonus via his EM buff. Groups small enemies so Ayaka's AoE Burst and Sprint attacks hit everything. Reduces Cryo and Hydro RES.
Consistent off-field Hydro application via Bake-Kurage jellyfish maintains Freeze aura between Ayaka rotations. Heals the team passively. Unlike Mona, Kokomi never runs out of Hydro application mid-fight.
Talents & Constellations
Talents
5-hit sword combo. During the 5-second window after Sprint, all Normal and Charged Attacks deal Cryo DMG — this is Ayaka's primary damage window outside of her Burst. The A1 passive boosts Normal/Charged ATK DMG by 30% for 6s after using Skill.
Summons blooming ice beneath Ayaka and nearby enemies, dealing AoE Cryo DMG. A1 passive: after Hyouka, Normal and Charged Attack DMG is increased by 30% for 6 seconds. Generates 4 Cryo Particles.
Unleashes a Frostflake Seki no To — a swirling Cryo tornado that moves toward enemies, dealing repeated AoE Cryo DMG for its duration, then explodes in a final Frostflake ring hit. Against Frozen targets, all hits are amplified by Blizzard Strayer's CRIT Rate passive. One of the highest-damage Bursts in the game when properly buffed.
Ayaka's sprint. After sprinting, she briefly wraps herself in Cryo and Normal/Charged Attacks deal Cryo DMG for 5 seconds. This is how she maintains on-field Cryo infusion — Sprint → attack → Sprint → repeat. The A4 passive also grants +18% Cryo DMG Bonus for 10s after the infusion ends.
When Ayaka's Cryo infusion from Sprint ends, all nearby party members gain +18% Cryo DMG Bonus for 10 seconds. This buff has nearly 100% uptime with normal Sprint rotation, passively buffing Shenhe and any other Cryo units in the team.
Constellations
When Kamisato Art: Soumetsu's Frostflake Ring hits, it creates additional Frostflake petals that each deal Cryo DMG at 12% of the ring's DMG. Minor damage increase across the Burst duration.
Is it worth getting?
Small consistent buff to Burst output. Not worth pulling for but welcome.
Sprint cooldown reduced by 1 second (easier uptime) and each Normal/Charged Attack during Cryo infusion generates a Cryo Particle. This substantially reduces Ayaka's ER requirement in practice.
Is it worth getting?
Significant QoL and ER reduction. Makes maintaining Burst rotation much more comfortable. A meaningful step forward.
Increases Kamisato Art: Soumetsu level by 3, directly boosting all Burst multipliers.
Is it worth getting?
Direct Burst damage improvement. The most impactful level upgrade.
After Ayaka uses her Burst, all nearby party members gain +30% ATK for 10 seconds. Makes Ayaka a strong buffer for the rest of the team after her rotation.
Is it worth getting?
Team buff is very welcome. Helps all characters in the team post-Burst window.
Increases Kamisato Art: Hyouka level by 3.
Is it worth getting?
Moderate incremental gain.
Every 10 hits of Kamisato Art: Soumetsu, Ayaka gains the Musou no Hitotachi state for 3 seconds. During this state, her next Charged Attack deals 300% of ATK as Cryo DMG and removes the target's Cryo aura (for Shatter prevention). This is a massive Charged Attack nuke.
Is it worth getting?
Endgame DPS ceiling. The Musou Charged Attack is one of the largest single-hit numbers from a non-Burst ability. Recommended only for high-investment Ayaka players.
C0 is fully viable for all content. First stop for serious investment: C2 (ER reduction + Sprint QoL). Endgame target: C6. First stop: C2. Endgame target: C6.
Alternatives to Ayaka
Not sure Ayaka is right for you? Compare against other characters to find your best pull.

Better in Melt and some Freeze variants; AoE-focused Charged Attack playstyle.

Self-sufficient Cryo catalyst DPS; no dedicated Freeze requirement.

Physical Claymore DPS; different archetype (Superconduct not Freeze).