Overview
Quick Build
Artifacts
Echoes of an Offering
4-Piece · ATK/Proc-based
Sands
ATK%
Main stat
Goblet
Hydro DMG%
Main stat
Circlet
CRIT Rate / DMG
Substats
CRIT Rate ≥ CRIT DMG > ATK% > HP%
Strengths
- Strong, consistent damage output in both multi-target and single-target scenarios
- Valuable on-field and off-field Hydro application
- Wide variety of team compositions
- Multiple Resin-efficient artifact options
- High viability without Constellations
Weaknesses
- 12s Skill cooldown resulting in 24–25s rotations which do not sync well with most other characters’ cooldowns
- Free-to-play weapon selection that performs significantly worse than other options
- Lack of front-loaded damage without Constellations
- Competition from other Hydro units
- Team compositions that require highly-contested teammates
Talent Priority
Main source of damage or utility. Level to 10.
Level minimally or skip.
Substat Priority
Double Hydro resonance and Kokomi's Jellyfish provide ample Hydro Particles. 130% is comfortable.
Fewer Hydro Particles without a second Hydro unit. Aim for 140% or use Favonius Sword.
Mostly Hydro Particles from Ayato alone. Use Festering Desire or aim for 145% ER.
Double Hydro resonance (Ayato + Kokomi) provides +25% HP for better Namisen scaling and more Hydro Particles. Use Favonius Sword or Festering Desire if ER-starved.
Weapons
5-star Weapons


4-star Weapons
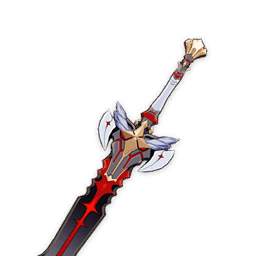


Artifact Sets

Sands
ATK%
Goblet
Hydro DMG%
Circlet
CRIT Rate / DMG

Sands
ATK%
Goblet
Hydro DMG%
Circlet
CRIT Rate / DMG

Sands
ATK%
Goblet
Hydro DMG%
Circlet
CRIT Rate / DMG
Team Compositions

Ayato
Main DPS

Shenhe
Support

Kazuha
Support

Kokomi
Healer / Hydro
Ayato's most common high-end team. Shenhe buffs all Cryo DMG and provides Cryo RES shred; Kazuha groups enemies and provides Hydro/Cryo DMG Bonus; Kokomi provides off-field Hydro and healing. Ayato's rapid Shunsuiken attacks freeze enemies continuously, and Blizzard Strayer CRIT Rate bonus applies to Shenhe's periodic hits.
On-field Hydro DPS. Rapid Shunsuiken attacks apply Hydro at an extremely high rate, triggering Freeze with Shenhe/Ganyu's Cryo application. All hits benefit from Blizzard Strayer's passive CRIT Rate when against Frozen targets.
Provides Cryo application for Freeze and Icy Quills that buff all Cryo hits (Kokomi's Bake-Kurage, Shenhe's own hits). Also Cryo RES shred via Burst.
Groups enemies for Ayato's AoE. Swirls Hydro or Cryo to provide +35–40% Hydro or Cryo DMG Bonus to the team. Reduces both Hydro and Cryo RES.
Bake-Kurage provides consistent off-field Hydro for when Ayato exits his Skill stance. Heals the team. Double Hydro resonance with Ayato also grants +25% HP — boosting Namisen stacks.
Talents & Constellations
Talents
Standard 5-hit sword combo. During Takimeguri Kanka (Skill), Normal Attacks become Hydro Shunsuiken slashes — fast, individual hits that each build Namisen stacks. Level alongside Skill.
Ayato enters Takimeguri Kanka stance for 6 seconds. Normal Attacks become Hydro Shunsuiken slashes dealing Hydro DMG with no ICD (each hit can react independently). Each hit grants a Namisen stack (max 5); stacks multiply Shunsuiken DMG by a % of Max HP (max 56% at 5 stacks). Stance ends if HP changes. During Kyouka, he can't use Charged Attacks.
Deploys a Weeping Willow of the Lake sphere that deals AoE Hydro DMG every 0.5s for 18 seconds. While inside the sphere, all party members' Normal Attack SPD is increased by 11%. The off-field Hydro also enables reactions for teammates. Costs 80 Energy.
While in Takimeguri Kanka, when Ayato has 5 Namisen stacks, each Shunsuiken hit has a 50% chance to ignore 45% of the enemy's DEF. In practice this averages roughly 22.5% DEF ignore per hit at max stacks — a significant damage bonus against high-DEF enemies.
Characters under the effect of Kamisato Art: Suiyuu (inside the Burst sphere) gain +2 Normal Attack hits and their Normal Attack DMG is increased by an amount scaling off Ayato's Max HP. This means Burst proximity actively amplifies teammate Normal Attack damage — strong in teams where the whole party fights close-range.
Constellations
At the end of Takimeguri Kanka, Ayato unleashes a 2-hit Shunsuiken combo dealing 300% of the skill's Shunsuiken DMG. Direct damage increase to the Skill window.
Is it worth getting?
Solid constant DPS upgrade. Not a reason to pull but very welcome.
Maximum Namisen stacks raised from 5 to 6, and if Ayato has at least 3 Namisen stacks, his Max HP is increased by 50%. The HP increase amplifies Namisen's HP-scaling DMG bonus and also boosts the Burst field's HP-scaling ATK bonus.
Is it worth getting?
Large HP and DMG increase. The +50% Max HP is substantial for Namisen scaling. A meaningful constellation.
Increases Kamisato Art: Suiyuu level by 3.
Is it worth getting?
Incremental Burst damage and Burst field DMG bonus increase.
After Takimeguri Kanka ends, Ayato fires 2 extra Shunsuiken slashes for 3 seconds. Extends his effective damage window beyond the Skill stance.
Is it worth getting?
Extra damage after stance ends — smooths out rotation gaps.
Increases Kamisato Art: Kyouka level by 3, boosting Shunsuiken multipliers.
Is it worth getting?
Direct Shunsuiken damage improvement. The most impactful level up for his kit.
Shunsuiken hits gain +20% CRIT DMG. Every 10 hits resets Takimeguri Kanka's cooldown. Combined with C1 and C5, this enables a dramatically extended Skill window and significantly higher damage ceiling.
Is it worth getting?
Endgame investment. +20% CRIT DMG plus near-unlimited Skill resets represent a transformative DPS ceiling. The target for fully invested Ayato players.
C0 is fully viable. C2 is the most impactful constellation (HP buff). Endgame target: C6. First stop: C2. Endgame target: C6.
Alternatives to Ayato
Not sure Ayato is right for you? Compare against other characters to find your best pull.

Stronger single-target Hydro DPS; charged-attack focused, different playstyle.

Faster Hydro application and better off-field Burst; more complex rotation.

Best off-field Hydro Sub-DPS; frees your main DPS slot for another carry.