Overview
Quick Build
Weapon
A part of the "Millennial Movement" that wanders amidst the winds. Increases Elemental Mastery by 60 / 75 / 90 / 105 / 1
Artifacts
Viridescent Venerer
Increases Swirl and Stellar Swirl reaction DMG by 60%. Decreases opponent's Elemental RES to the element infused in the
Sands
ATK % / Energy Recharge
Main stat
Goblet
ATK %
Main stat
Circlet
Healing Bonus / CRIT Rate > CRIT DMG
Substats
Energy Recharge > CRIT Rate(Fav) > ATK %
Strengths
- Versatile support capabilities providing both damage and utility bringing buffs to CRIT Rate, CRIT DMG, Elemental Mastery and RES Shred.
- Powerful healing allowing her to slot into any team that simply wants a healer.
- Elemental Skill allows you to gain additional elemental application of a chosen element from your party.
Weaknesses
- Moonsign: Ascendant Gleam is required for Jahoda to have most of her utility.
- C6 is a significant boost to Jaohda's utility and only an upgrade in teams at C6.
- Outside of teams where Jahoda simply acts as a healer, there's not a large amount of Moonsign DPS available for Jahoda to buff currently.
- Elemental Skill takes a large amount of field time forcing longer rotations while not a lot of damage is taking place during Jahoda's Skill.
Talent Priority
Primary source of damage or support. Level to 10 first.
Important for damage or support value. Level second.
Lowest priority. Level last or skip unless you have spare resources.
Substat Priority
Jahoda is a healer who also provides supportive utility to the party. As a Nod-Krai character, Jahoda provides an increase to the party's Moonsign level with most of Jahoda's non-healing utility coming from when the party has Moonsign: Ascendant Gleam. Jahoda's Elemental Skill Savvy Strategy: Splitt
Jahoda is a healer who also provides supportive utility to the party. As a Nod-Krai character, Jahoda provides an increase to the party's Moonsign level with most of Jahoda's non-healing utility comin...
Weapons
5-star Weapons
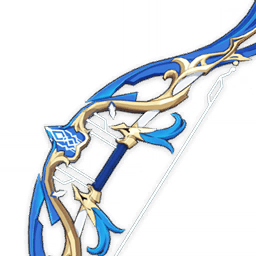
Energy Recharge 45.9% · Base ATK 510
4-star Weapons
Artifact Sets
Sands
ATK % / Energy Recharge
Goblet
ATK %
Circlet
Healing Bonus / CRIT Rate > CRIT DMG
Sands
ATK % / Energy Recharge
Goblet
ATK %
Circlet
Healing Bonus / CRIT Rate > CRIT DMG
Team Compositions

Flins
Main DPS

Ineffa
Support

Yelan
Support

Jahoda
Sustain
This team optimizes Flins's Lunar-Charge damage by utilizing Jahoda's off-field utility and Moonsign synergy. It provides consistent elemental application and energy generation to maintain high uptime for the party's rotations.
Jahoda has great synergy with Flins as she can be a great substitute for Sucrose or an upgrade at C6, this also makes Yelan a great Hydro option instead of Aino due to Jahoda's cooldown being longer if you ever needed to free Aino up for another Moonsign team.
Maintains Hydro and Electro auras to trigger Lunar-Charged damage procs, which amplify Flins's DPS via the Electrifying Edict effect.
Provides persistent off-field Hydro application via her Elemental Burst, enabling consistent reaction uptime for Flins.
Activates Ascendant Gleam through Moonsign resonance to generate energy for Flins and provide consistent off-field elemental application.
Talents & Constellations
Talents
Performs up to 3 consecutive shots with a bow.
Jahoda dashes toward her opponent, entering the Shadow Pursuit state upon contact. While in this state, Jahoda moves continuously and swiftly: If nearby opponents are affected by Pyro, Hydro, Electro, or Cryo, she will quietly convert her Purr-loined Treasure Flask to that element, gradually filling it. When the duration ends or the skill is used again, Jahoda drains the Purr-loined Treasure Flask and deals a single instance of Anemo DMG to nearby opponents. When the Purr-loined Treasure Flask is full, Jahoda immediately drains it, exiting the Shadow Pursuit state and dealing a more powerful instance of Anemo DMG. If her dash fails to make contact with an opponent, Jahoda instead drops a Smoke Bomb at her location, dealing a single instance of Anemo DMG to nearby opponents. Moonsign: Ascendant Gleam: When the Purr-loined Treasure Flask becomes full, Jahoda will not immediately discharge it. Instead, for a short duration, she steadily consumes the stored element inside and periodically fires Fluffy Meowballs at nearby opponents, dealing DMG of the corresponding element stored in the Purr-loined Treasure Flask. When a Fluffy Meowball hits an opponent, Jahoda regenerates 2 Elemental Energy. This effect can be triggered once every 3.5s. There are many ways to divide wealth in this world — but for Nod-Krai's treasure hunters — and hoarders — only one has ever proven sufficiently effective.
Time to reveal those pocket aces! Jahoda retrieves 2 Purrsonal Coordinated Assistance Robots and deals a single instance of Anemo DMG to nearby opponents. _"Coordinated assistance? It means you 'assist' some Mora our way, and we handle the 'coordination.' Makes purrfect sense, don't you agree?"_
When your team has at least one Pyro, Hydro, Electro, or Cryo character, the Purrsonal Coordinated Assistance Robots from the Elemental Burst Hidden Aces: Seven Tools of the Hunter will be enhanced based on the number of characters of each corresponding element. Jahoda secretly keeps track of these characters. Among them, the element with the highest number of characters determines the enhancement effect: · Pyro: Purrsonal Coordinated Assistance Robots deal 130% of their original DMG. · Hydro: Purrsonal Coordinated Assistance Robots heal for 120% of their original healing amount. · Electro: The number of Purrsonal Coordinated Assistance Robots increases by one. · Cryo: The attack interval of Purrsonal Coordinated Assistance Robots is reduced by 10%. If there's a tie between elements, the order of priority that determines which enhancement takes effect is: Pyro, Hydro, Electro, then Cryo. Only one elemental effect can initially be triggered.
When a Purrsonal Coordinated Assistance Robot from the Elemental Burst Hidden Aces: Seven Tools of the Hunter triggers healing on an active team member, if that character's HP is above 70%, their Elemental Mastery will be increased by 100 for 6s.
When dispatched on an expedition in Nod-Krai, time consumed is reduced by 25%.
Constellations
When a Fluffy Meowball fired by the Purr-loined Treasure Flask from the Elemental Skill Savvy Strategy: Splitting the Spoils hits an enemy, there is a 50% chance for it to bounce, dealing the corresponding Elemental DMG to nearby opponents.
Is it worth getting?
Circumstantial improvement. Evaluate based on your playstyle.
Moonsign: Ascendant Gleam: In the Ascension Talent "Plan to Get Paid," Jahoda can secretly track, in addition to the element with the highest number of characters, the element with the next highest number of characters among the remaining types. This allows up to two elemental effects to be active at once. You must first unlock the Ascension Talent "Plan to Get Paid."
Is it worth getting?
Circumstantial improvement. Evaluate based on your playstyle.
Increases the Level of Hidden Aces: Seven Tools of the Hunter by 3. Maximum upgrade level is 15.
Is it worth getting?
Eases Energy Recharge requirements helpful for consistent rotations.
When a Purrsonal Coordinated Assistance Robot from the Elemental Burst Hidden Aces: Seven Tools of the Hunter undergoes an Elemental Conversion, Jahoda will recover 4 Elemental Energy.
Is it worth getting?
Eases Energy Recharge requirements helpful for consistent rotations.
Increases the Level of Savvy Strategy: Splitting the Spoils by 3. Maximum upgrade level is 15.
Is it worth getting?
Provides a situational buff. Worth it if you already have earlier constellations.
Moonsign: Ascendant Gleam: After the Purr-loined Treasure Flask from the Elemental Skill Savvy Strategy: Splitting the Spoils is full, nearby Moonsign characters in your party have their CRIT Rate increased by 5% and CRIT DMG increased by 40% for 20s.
Is it worth getting?
Eases Energy Recharge requirements helpful for consistent rotations.
C0 Jahoda is fully functional. Versatile support capabilities providing both damage and utility bringing buffs to CRIT Rate, CRIT DMG, Elemental Mastery and RES Shred.
Alternatives to Jahoda
Not sure Jahoda is right for you? Compare against other characters to find your best pull.

Another Anemo Support. Compare their weapon and artifact requirements, team synergies, and playstyle to decide which suits your roster better.

Another Anemo Support. Compare their weapon and artifact requirements, team synergies, and playstyle to decide which suits your roster better.

Another Anemo Healer. Compare their weapon and artifact requirements, team synergies, and playstyle to decide which suits your roster better.

Another Anemo Support. Compare their weapon and artifact requirements, team synergies, and playstyle to decide which suits your roster better.