
Cantarella
Cantarella
Yes for Havoc Skill amp / sustain hybrid—Cantarella enables Skill hypercarries. Liberation “Beneath the Sea” keeps coordinated attacks firing while other Resonators are on-field. Best with Camellya / Roccia / Shorekeeper. Havoc + Resonance Skill Outro only pays if the next Resonator actually Skill-dumps. Skip when your Havoc Skill cores are already fully staffed.
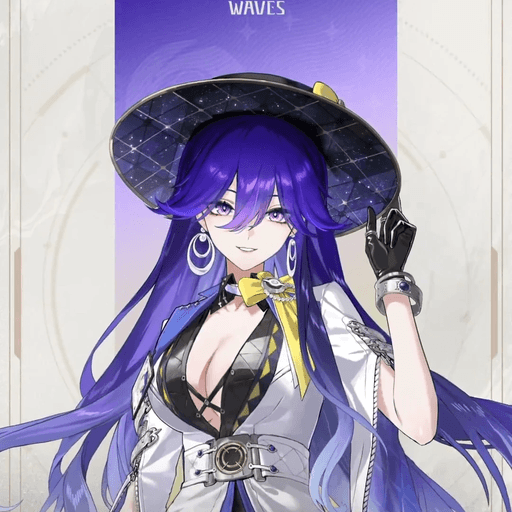
Cantarella is a 5★ Havoc Main DPS who fights with a Rectifier. Liberation “Beneath the Sea” keeps coordinated attacks firing while other Resonators are on-field. Forte “Between Illusion and Reality” keeps coordinated attacks firing while other Resonators are on-field.
Overview
Quick Build
Weapon
Whispers of Sirens
Signature option — largest personal spike once Liberation “Beneath the Sea” is online.
Echo Set
Havoc Eclipse (5pc)
Default Sonata match for this role/element package.
4-Cost
CRIT Rate / CRIT DMG
Main stat
3-Cost
Havoc DMG
Main stat
1-Cost
ATK%
Substats
CRIT Rate ≥ CRIT DMG > ATK% > Energy Regen
Strengths
- Liberation “Beneath the Sea” keeps coordinated attacks firing while other Resonators are on-field — that window is where Cantarella’s clear speed actually shows up.
- Forte “Between Illusion and Reality” keeps coordinated attacks firing while other Resonators are on-field, so resource banking is mandatory, not optional filler.
- Outro “Gentle Tentacles” amplifies the incoming Resonator’s damage on Outro handoff — swap timing is part of the damage plan, not just Concerto filling.
- Skill “Dance with Shadows” seeds coordinated pressure so Cantarella still contributes after leaving the field.
Weaknesses
- Field-time hungry once Liberation “Beneath the Sea” is up — double-DPS swaps dilute the dump window.
- Wants dedicated supports and ER planning; dropped into a random squad, Liberation uptime falls off a cliff.
Forte Priority
“Beneath the Sea” — keeps coordinated attacks firing while other Resonators are on-field. Level first.
“Between Illusion and Reality” — keeps coordinated attacks firing while other Resonators are on-field.
Primary generator / setup tool for Liberation and Forte.
Opens rotations and often refunds Concerto or setup buffs.
Team amp or handoff — important for supports, lower for selfish DPS.
Stat Priority
Build Concerto on supports → Intro Cantarella → “Dance with Shadows” / “Between Illusion and Reality” resource loop → “Beneath the Sea” dump → “Gentle Tentacles” or swap as needed.
Refine timings once you learn Concerto breakpoints for your specific team.
Weapons
CRIT / ATK (signature)
Signature Rectifier tuned to Cantarella's kit.
Why it works —Best-in-slot when you own it — pull only if you are committing to Liberation “Beneath the Sea” long-term.
CRIT Rate / ATK%
Any well-refined 5★ Rectifier with CRIT or ATK.
Why it works —Flexible premium stand-in while farming signature.
ATK% / Energy Regen
Accessible Rectifier option for early investment.
Why it works —Best F2P path — refine and swap off once a 5★ lands.
Echoes
Team Compositions
Premium Cantarella shell: Phrolova brings Heavy Attack amp; Lucilla is the Dual-DPS / quickswap partner. Rotation: open Phrolova / Lucilla for Concerto → Intro Cantarella → Liberation / Forte dump.
Cantarella is the on-fielder — bank Concerto on Phrolova / Lucilla, Intro in, then dump Liberation / Forte inside their amp windows.

Cantarella is easily Phrolova's best teammate as she amplifies her Havoc and Skill DMG via her Outro, takes a good amount of field time while doing good damage, and a lot of her actions are counted as Echo
Lucilla shares field time with Cantarella — trade Intro / Outro so both Liberation windows get amp coverage.
Forte & Resonance Chain
Forte
Basic Attack Perform up to 3 consecutive attacks, dealing Havoc DMG. Heavy Attack Consume STA to attack the target, dealing Havoc DMG. Heavy Attack - Delusive Dive When Cantarella has Trance, Heavy Attack becomes Delusive Dive, dealing Havoc DMG to the target, and then Cantarella enters Mirage. While in Mirage, casting Delusive Dive does not activate Mirage again. Can be cast in water. Mid-air Attack Consume STA to perform Plunging Attack, dealing Havoc DMG. Dodge Counter Press Normal Attack right after a successful Dodge to attack the target, dealing Havoc DMG.
Graceful Step Attack the target, dealing Havoc DMG. Flickering Reverie When in Mirage, Resonance Skill becomes Flickering Reverie, which is considered an Echo Skill when being cast. Attack the target, dealing Havoc DMG, and send them into Hazy Dream. Can be cast in mid-air. Hazy Dream Reduce the target's movement speed for 6.5s. When the target takes damage, Jolt is triggered once, removing Hazy Dream to deal Havoc DMG, considered Basic Attack DMG. Attacks by other Resonators in the team will not Jolt a target influenced by Hazy Dream and will remove the Hazy Dream. Coordinated Attacks and damage from Utilities will not Jolt a target.
Flowing Suffocation Attack the target, dealing Havoc DMG (considered Basic Attack DMG). Grant Diffusion to all Resonators in the team. Casting this skill is also considered as casting Echo Skill. Can be cast in mid-air close to the ground. Diffusion When the Resonator on the field deals damage to a target, summon Dreamweavers to perform Coordinated Attack, dealing Havoc DMG (considered as Basic Attack DMG). - Within 3s after the Resonator deals damage, summon 1 Dreamweavers per second. This effect can be triggered once per second. Damage dealt by Dreamweavers cannot trigger this effect. - Up to 1 Dreamweavers can be summoned each second, max 21 Dreamweavers in total. - This effect lasts for 30s or until reaching the maximum number of Dreamweavers.
Ripple Attack the target, dealing Havoc DMG. Press Normal Attack shortly after casting this skill to start the Basic Attack combo from Basic Attack Stage 3. Tidal Surge When in Mirage, Intro Skill becomes Tidal Surge, which triggers 3 coordinated attacks on hit, dealing Havoc DMG. Casting Tidal Surge resets the combo of Basic Attack Phantom Sting.
Amplify the incoming Resonator's Havoc DMG by 20% and Resonance Skill DMG by 25% for 14s. Switching Resonators ends this effect.
When the target's Off-Tune Level is full, the Resonator may cast Tune Break on the target.
Mirage - Basic Attack becomes Basic Attack Phantom Sting. Perform up to 3 consecutive attacks, dealing Havoc DMG. Can be cast in mid-air. When cast mid-air, Basic Attack Phantom Sting consumes STA, and the combo does not reset when Cantarella is airborne. - Hitting the target with Basic Attack Phantom Sting consumes 1 point of Trance to obtain 1 point of Shiver and heal all nearby Resonators in the team. - The third stage of Basic Attack Phantom Sting triggers 3 Coordinated Attacks, dealing Havoc DMG. - Mid-air Attack becomes Abysmal Vortex. Press Jump to perform a Plunging Attack at the cost of STA, dealing Havoc DMG. - Dodge Counter becomes Dodge Counter Shadowy Sweep. Attack the target, dealing Havoc DMG. Press Normal Attack right after casting the skill to cast Basic Attack Phantom Sting Stage 2. - When Mid-air Attack Abysmal Vortex or Dodge Counter Shadowy Sweep hits a target, consume 1 point of Trance to obtain 1 point of Shiver and heal all nearby Resonators in the team. - Mirage lasts for 8s. - Mirage ends when Trance is depleted. Forte Circuit - Perception Drain If Cantarella has 3 points of Shiver when in Mirage, Resonance Skill becomes Perception Drain. Consume all Shiver to attack the target, dealing Havoc DMG, considered Basic Attack DMG. Send the target into Hazy Dream and heal all Resonators in the team. Casting this skill is also considered as casting Echo Skill. Can be cast in mid-air. Abyssal Rebirth After casting Intro Skill, Cantarella enters Abyssal Rebirth, which lasts for 25s and can be activated once every 25s. In the duration, for up to 6 times, when Resonators in the team cast Echo Skill, Cantarella recovers 6 points of Concerto Energy. Echoes with the same name can only trigger this effect once. When in water, Cantarella's swimming speed increases and STA cost decreases. Trance - Cantarella can hold up to 5 points of Trance. - Casting Intro Skill recovers 1 point of Trance. - Hitting a target with Basic Attack Stage 3 recovers 1 point of Trance. - Casting Resonance Skill Graceful Step recovers 1 point of Trance. - Casting Resonance Liberation Flowing Suffocation recovers 3 points of Trance. - When in the water, recover 1 point of Trance every 5s. Shiver - Cantarella can hold up to 3 points of Shiver. - Hitting the target with Basic Attack Phantom Sting recovers 1 point of Shiver. - When Mid-air Attack Abysmal Vortex or Dodge Counter Shadowy Sweep hits a target, restore 1 point of Shiver.
Increase Healing Bonus by 20%.
Casting Echo Skill gives 6% Havoc DMG Bonus for 10s, stacking up to 2 times.
Has a chance to produce special dishes when cooking.
Resonance Chain
Casting Resonance Skill recovers 1 points of Trance. The DMG Multiplier of Resonance Skill Graceful Step, Resonance Skill Flickering Reverie, and Forte Circuit Perception Drain is increased by 50%. Immune to interruptions while casting Perception Drain.
Is it worth getting?
Modest S1: Adds RES / DEF shred or a large DMG Bonus clause. Helpful padding, not a build-defining unlock.
Resonance Liberation Flowing Suffocation now sends the target into Hazy Dream. The DMG Multiplier of Jolt triggered by Cantarella is increased by 245%.
Is it worth getting?
Stat-leaning S2: Adds RES / DEF shred or a large DMG Bonus clause. Clear damage, but it does not rewrite Cantarella’s rotation the way a mechanic Sequence would.
The DMG Multiplier of Resonance Liberation Flowing Suffocation is increased by 370%. After casting Resonance Liberation Flowing Suffocation, enter into Mirage. If already in Mirage, casting Resonance Liberation Flowing Suffocation does not activate the Mirage state again.
Is it worth getting?
Situational S3: Adds RES / DEF shred or a large DMG Bonus clause.
When in Mirage, Healing Bonus is increased by 25%.
Is it worth getting?
Side-grade: Stronger heal radius, uptime, or Stellarealm sustain. Happy if it drops; not a planned stopping point.
The maximum number of Dreamweavers Cantarella can summon through Resonance Liberation Diffusion is increased by 5.
Is it worth getting?
Late luxury: Adds RES / DEF shred or a large DMG Bonus clause. Grab it if you overshoot toward S6 — never hard-pity for S5 alone.
Increase the DMG Multiplier of Basic Attack Phantom Sting by 80%. Casting Resonance Liberation Flowing Suffocation makes Cantarella's DMG ignore 30% of the target's DEF for 10s. For the first 1.2s of Hazy Dream, when the target takes an instance of DMG that does not inflict Hazy Dream, Jolt will not be triggered on the target.
Is it worth getting?
Whale ceiling: Adds RES / DEF shred or a large DMG Bonus clause. Only chase if Cantarella is your dedicated main and S0–S2 already feel finished.
Cantarella is fully usable at S0. Most dedicated mains stop at S2 before chasing higher Wavebands. First stop: S2. Endgame target: S2.
Alternatives to Cantarella
Not sure Cantarella is right for you? Compare against same-Attribute Main DPS Resonators.

You need a Havoc Main DPS and Camellya's kit matches your account gap.

You need a Havoc Main DPS and Chisa's kit matches your account gap.
You need a Havoc Main DPS and Phrolova's kit matches your account gap.

You need a Havoc Main DPS and Roccia's kit matches your account gap.

You need a Havoc Main DPS and Rover (Havoc)'s kit matches your account gap.