
Galbrena
Galbrena
Yes for Fusion on-field burst—Galbrena’s Liberation dump is the clear plan. Liberation “Hellfire Absolution” routes damage through mid-air / plunging attack chains. Best with Changli / Brant / Shorekeeper. Needs Fusion amp and clean Concerto before the Liberation window. Skip when Changli/Lupa already cover both Fusion sides.
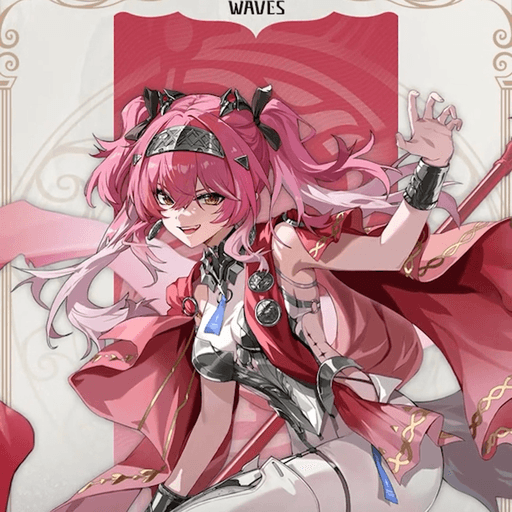
Galbrena is a 5★ Fusion Main DPS who fights with a Pistols. Liberation “Hellfire Absolution” routes damage through mid-air / plunging attack chains. Forte “Beyond Threshold” routes damage through mid-air / plunging attack chains.
Overview
Quick Build
Weapon
Spectrum Blaster
Signature option — largest personal spike once Liberation “Hellfire Absolution” is online.
Echo Set
Molten Rift (5pc)
Default Sonata match for this role/element package.
4-Cost
CRIT Rate / CRIT DMG
Main stat
3-Cost
Fusion DMG
Main stat
1-Cost
ATK%
Substats
CRIT Rate ≥ CRIT DMG > ATK% > Energy Regen
Strengths
- Liberation “Hellfire Absolution” routes damage through mid-air / plunging attack chains — that window is where Galbrena’s clear speed actually shows up.
- Forte “Beyond Threshold” routes damage through mid-air / plunging attack chains, so resource banking is mandatory, not optional filler.
- Aerial / plunge routes give flexible dodge and reposition options mid-combo.
- Dodge Counter recoveries let you rejoin the combo after a mistimed i-frame.
Weaknesses
- Field-time hungry once Liberation “Hellfire Absolution” is up — double-DPS swaps dilute the dump window.
- Wants dedicated supports and ER planning; dropped into a random squad, Liberation uptime falls off a cliff.
Forte Priority
“Hellfire Absolution” — routes damage through mid-air / plunging attack chains. Level first.
“Beyond Threshold” — routes damage through mid-air / plunging attack chains.
Primary generator / setup tool for Liberation and Forte.
Opens rotations and often refunds Concerto or setup buffs.
Team amp or handoff — important for supports, lower for selfish DPS.
Stat Priority
Build Concerto on supports → Intro Galbrena → “Edge Transcended” / “Beyond Threshold” resource loop → “Hellfire Absolution” dump → “Ashen Pursuit” or swap as needed.
Refine timings once you learn Concerto breakpoints for your specific team.
Weapons
CRIT / ATK (signature)
Signature Pistols tuned to Galbrena's kit.
Why it works —Best-in-slot when you own it — pull only if you are committing to Liberation “Hellfire Absolution” long-term.
CRIT Rate / ATK%
Any well-refined 5★ Pistols with CRIT or ATK.
Why it works —Flexible premium stand-in while farming signature.
ATK% / Energy Regen
Accessible Pistols option for early investment.
Why it works —Best F2P path — refine and swap off once a 5★ lands.
Echoes
Team Compositions
Premium Galbrena shell: Lupa brings Basic Attack amp; Mornye brings All-DMG amp. Rotation: open Lupa / Mornye for Concerto → Intro Galbrena → Liberation / Forte dump.
Galbrena is the on-fielder — bank Concerto on Lupa / Mornye, Intro in, then dump Liberation / Forte inside their amp windows.
Lupa Outros Basic Attack Amplification — hand off into Galbrena’s basic / Forte window immediately.

Mornye grants team-wide All-DMG Amplification — a generalist amp seat that stacks cleanly into Galbrena’s Liberation.
Forte & Resonance Chain
Forte
Basic Attack Perform up to 4 consecutive attacks, dealing Fusion DMG. Basic Attack Stage 1 to 3 DMG are considered as Heavy Attack DMG, and Basic Attack Stage 4 DMG as Echo Skill DMG. Press Normal Attack right after performing Basic Attack Stage 4 to perform Basic Attack Stage 2. Heavy Attack - Volley of Death Consume STA to attack the target and perform up to 3 consecutive attacks, dealing Fusion DMG. Stage 3 DMG is considered as Echo Skill DMG. Press Normal Attack right after performing Heavy Attack - Volley of Death Stage 1 to perform Basic Attack Stage 2. Press Normal Attack right after performing Heavy Attack - Volley of Death Stage 2 or 3 to perform Basic Attack Stage 3. Mid-air Attack - Ashfall Barrage While in mid-air, press Normal Attack to consume STA to perform a Plunging Attack, dealing Fusion DMG, considered as Heavy Attack DMG. While in mid-air, hold Normal Attack to continuously consume STA to launch a barrage of shots at targets below, dealing Fusion DMG, considered as Heavy Attack DMG. If Galbrena does not land when interrupted during the barrage, she cannot immediately cast this skill again. Release Normal Attack during the barrage to cast Plunging Attack. Press Normal Attack right after casting Plunging Attack to cast Basic Attack Stage 3. Dodge Counter - Blood for Blood Press Normal Attack right after a successful Dodge to attack the target, dealing Fusion DMG, considered as Heavy Attack DMG. Press Normal Attack right after casting this skill to cast Basic Attack Stage 4.
Resonance Skill - Encroach Dash forward and leap into the air. Flip backward upon hitting the target, dealing Fusion DMG, considered Heavy Attack DMG. Resonance Skill - Ascent of Malice Upon reaching 100 points of Sinflame, Resonance Skill is replaced with Resonance Skill - Ascent of Malice. Slash at enemies with her wings, dealing Fusion DMG, considered Heavy Attack DMG. Upon casting this skill: - Galbrena enters Demon Hypostasis. - Sinflame is converted into an equivalent amount of Purging Flame. - Can be followed by Basic Attack - Seraphic Execution Stage 2.
Attack the target and deal Fusion DMG, considered Echo Skill DMG. Gain 85% DMG Multiplier increase for Basic Attack - Seraphic Execution, Heavy Attack - Flamewing Verdict, Mid-air Attack - Hellsent Barrage, and Dodge Counter - Purgatory Scourge for 14s while in Demon Hypostasis. Press Normal Attack after casting Resonance Liberation to cast Basic Atttack Stage 2. While in Demon Hypostasis, cast Basic Attack - Seraphic Execution Stage 2 instead. Can be cast in mid-air close to the ground.
Attack the target and deal Fusion DMG. Hold Normal Attack after casting this skill to cast Heavy Attack - Volley of Death Stage 2. While in Demon Hypostasis, cast Heavy Attack - Flamewing Verdict Stage 2 instead. Press Normal Attack right after casting this skill to perform Basic Attack Stage 2, which is replaced with Basic Attack - Seraphic Execution Stage 2 if Galbrena is in Demon Hypostasis.
Attack the target, dealing Fusion DMG equal to 79.5%*3+556.5% of Galbrena's ATK.
When the target's Off-Tune Level is full, the Resonator may cast Tune Break on the target.
Threshold State By default, Galbrena is in Threshold State, and in this state, she accumulates Afterflame and Sinflame. Demon Hypostasis While in Demon Hypostasis, Basic Attack, Heavy Attack - Volley of Death, Mid-air Attack - Ashfall Barrage, Dodge Counter - Blood for Blood, and Resonance Skill - Encroach are replaced with Basic Attack - Seraphic Execution, Heavy Attack - Flamewing Verdict, Mid-air Attack - Hellsent Barrage, Dodge Counter - Purgatory Scourge, and Resonance Skill - Ravage, which consume Purging Flame on hit. While in Demon Hypostasis, every point of Afterflame increases the DMG of Basic Attack - Seraphic Execution, Heavy Attack - Flamewing Verdict, Mid-air Attack - Hellsent Barrage, Resonance Skill - Ravage, and Dodge Counter - Purgatory Scourge by 1.5%, up to 60%, which is removed upon exiting Demon Hypostasis. When Purging Flame depletes or after staying in Demon Hypostasis for over 50s, Demon Hypostasis ends automatically. Basic Attack - Seraphic Execution Perform up to 5 consecutive attacks, dealing Fusion DMG. Consume Purging Flame on hit. Stage 1 to 3 DMG are considered Heavy Attack DMG, and Stage 4 & 5 DMG Echo Skill DMG. Press Normal Attack after casting Basic Attack - Seraphic Execution Stage 5 to cast Basic Attack - Seraphic Execution Stage 3. Heavy Attack - Flamewing Verdict Consume STA to attack the target and perform up to 3 consecutive attacks, dealing Fusion DMG. Consume Purging Flame on hit. Stage 3 DMG is considered Echo Skill DMG. Press Normal Attack after casting Heavy Attack - Flamewing Verdict Stage 1 to cast Basic Attack - Seraphic Execution Stage 2. Press Normal Attack after casting Heavy Attack - Flamewing Verdict Stage 2 & 3 to cast Basic Attack - Seraphic Execution Stage 3. Mid-air Attack - Hellsent Barrage While in mid-air, press Normal Attack to consume STA to perform aerial attacks, dealing Fusion DMG, considered Heavy Attack DMG. Consume Purging Flame on hit. While in mid-air, hold Normal Attack to continuously consume STA to launch a barrage of shots at targets, dealing Fusion DMG, considered Heavy Attack DMG. Consume Purging Flame on hit. If Galbrena does not land when interrupted during the barrage, she cannot immediately cast this skill again. Release Normal Attack during the barrage to cast Plunging Attack. Press Normal Attack after the Plunging Attack to cast Basic Attack - Seraphic Execution Stage 3. Dodge Counter - Purgatory Scourge Press Normal Attack right after a successful Dodge to attack the target, dealing Fusion DMG, considered Heavy Attack DMG. Press Normal Attack right after casting this skill to cast Basic Attack - Seraphic Execution Stage 4. Resonance Skill - Ravage Dash forward and leap into the air. Flip backward upon hitting the target, dealing Fusion DMG, considered Heavy Attack DMG. Consume Purging Flame on hit. Resonance Skill - Ravage and Resonance Skill - Encroach share a cooldown. Hellstride Press Dodge on the ground while casting Galbrena's own skills to cast Hellstride to deal a fixed amount of Fusion DMG, considered Basic Attack DMG that does not bear any effect from DMG buffs. Hellstride can trigger successful Dodges. Hellstride cannot be cast consecutively. Casting this skill does not reset the attack cycles within a short period of time. Burning Drive Casting Intro Skill, Hellstride, Normal Attack - Seraphic Execution Basic Attack Stage 4, Resonance Skill - Encroach, Resonance Skill - Ascent of Malice, and Resonance Skill - Ravage increases Galbrena's resistance to interruptions and ATK by 20% for 4s. Afterflame Galbrena can hold up to 40 points of Afterflame. While in Threshold State, Galbrena recovers 8 points of Afterflame when Resonators in the nearby team cast Echo Skill. Echoes with the same name can only trigger this effect once. This effect resets when Galbrena exits Demon Hypostasis. All Afterflame is removed upon exiting Demon Hypostasis. Sinflame Galbrena can hold up to 100 points of Sinflame. While in Threshold State, hitting an enemy with Basic Attack, Heavy Attack - Volley of Death, Mid-air Attack - Ashfall Barrage, Resonance Skill - Encroach, and Intro Skill - Hellflare Overload recovers Sinflame.
1 stack of Fated End is inflicted on the target when the following skills hit: Intro Skill, Basic Attack, Basic Attack - Seraphic Execution, Dodge Counter, Heavy Attack - Volley of Death, Heavy Attack - Flamewing Verdict, Mid-air Attack, Hellstride, Resonance Skill - Encroach, Resonance Skill - Ascent of Malice, Resonance Skill - Ravage and Resonance Liberation, up to 4 stacks. Each stack Amplifies the DMG directly dealt by Galbrena's Normal Attack, Resonance Skill, Forte Circuit, Resonance Liberation, Intro Skill, and Outro Skill by 5% for 5.5s. The same type of skill can trigger this effect on the same target once every 5s. Resonance Skill - Encroach and Resonance Skill - Ravage are considered the same type of skill.
Casting Basic Attack Stage 4, Basic Attack - Seraphic Execution Stage 5, Heavy Attack - Volley of Death Stage 3, and Heavy Attack - Flamewing Verdict Stage 3 recovers 10 points of STA.
Has a chance to produce special dishes when cooking.
Resonance Chain
When casting Resonance Skill - Ascent of Malice, each point of Afterflame additionally grants 2% Crit. DMG to Basic Attack - Seraphic Execution, Heavy Attack - Flamewing Verdict, Mid-air Attack - Hellsent Barrage, Resonance Skill - Ravage, and Dodge Counter - Purgatory Scourge, up to 80%. This effect is removed upon exiting Demon Hypostasis. While in Demon Hypostasis, Basic Attack - Seraphic Execution Stage 5, Heavy Attack - Flamewing Verdict Stage 3, and Mid-air Attack - Hellsent Barrage are immune to interruption.
Is it worth getting?
Modest S1: Adds RES / DEF shred or a large DMG Bonus clause. Helpful padding, not a build-defining unlock.
Burning Drive grants 350% more ATK Bonus.
Is it worth getting?
Kit add-on: Burning Drive grants 350% more ATK Bonus. Evaluate against your supports — pull only if that clause solves a problem you actually hit.
Resonance Liberation DMG Multiplier is increased by 130%.
Is it worth getting?
Situational S3: Adds RES / DEF shred or a large DMG Bonus clause.
When Resonators in the team cast Echo Skill, all Resonators in the team gain 20% all-Attribute DMG Bonus for 20s.
Is it worth getting?
Side-grade: Adds RES / DEF shred or a large DMG Bonus clause. Happy if it drops; not a planned stopping point.
The DMG Multipliers of Resonance Skill - Encroach, Resonance Skill - Ascent of Malice, and Resonance Skill - Ravage are increased by 150%.
Is it worth getting?
Late luxury: Adds RES / DEF shred or a large DMG Bonus clause. Grab it if you overshoot toward S6 — never hard-pity for S5 alone.
Demon Hypostasis becomes Eternal Hypostasis. Eternal Hypostasis retains all effects of Demon Hypostasis. Additionally, Eternal Hypostasis lasts, the DMG Multipliers of Basic Attack - Seraphic Execution, Heavy Attack - Flamewing Verdict, Mid-air Attack - Hellsent Barrage, and Dodge Counter -Purgatory Scourge are additionally increased by 60%. When casting Resonance Skill - Ascent of Malice, for every 1 point of Afterflame consumed, Galbrena's Basic Attack - Seraphic Execution, Heavy Attack - Flamewing Verdict, Mid-air Attack - Hellsent Barrage, Resonance Skill - Ravage, and Dodge Counter -Purgatory Scourge gain 0.875% Fusion DMG Amplification, up to 35%, which is removed upon exiting Eternal Hypostasis.
Is it worth getting?
Whale ceiling: Extra Amplification on Liberation / attribute damage. Only chase if Galbrena is your dedicated main and S0–S2 already feel finished.
Galbrena is fully usable at S0. Most dedicated mains stop at S2 before chasing higher Wavebands. First stop: S2. Endgame target: S2.
Alternatives to Galbrena
Not sure Galbrena is right for you? Compare against same-Attribute Main DPS Resonators.

You need a Fusion Main DPS and Aemeath's kit matches your account gap.

You need a Fusion Main DPS and Brant's kit matches your account gap.

You need a Fusion Main DPS and Changli's kit matches your account gap.

You need a Fusion Main DPS and Denia's kit matches your account gap.

You need a Fusion Main DPS and Encore's kit matches your account gap.
You need a Fusion Main DPS and Lupa's kit matches your account gap.
You need a Fusion Main DPS and Mornye's kit matches your account gap.