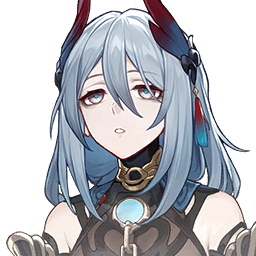
Hanya
Situational—Hanya refunds SP via Burden. Ultimate “Ten-Lords' Decree, All Shall Obey” is the named payoff ability for this rotation. Best with Dan Heng • Imbibitor Lunae / Qingque / Argenti. SP generator; buffs lag modern Harmonies. Skip when Sparkle already solves SP.
Hanya is a 4★ Physical Harmony Support. Skill “Samsara, Locked” is the primary in-combat spend. Ultimate “Ten-Lords' Decree, All Shall Obey” is the payoff window for damage or team utility. This Phase 1 page covers kit text, gear targets, and pull notes—team comps stay empty until Phase 2.
Overview
Quick Build
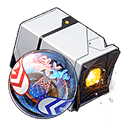
Light Cone
But the Battle Isn't Over
Best available Harmony cone on this account path.
Relic Set
Messenger Traversing Hackerspace (4pc) + Broken Keel (2pc)
Standard Harmony relic direction for Hanya.
Body
HP%
Main stat
Feet
SPD
Main stat
Sphere / Rope
HP% · ERR%
Substats
SPD > ERR / HP% / effect as needed
Strengths
- Ultimate “Ten-Lords' Decree, All Shall Obey” Increases the SPD of a target ally by 22.5% of Hanya's SPD and increases the same target ally's ATK by 72%—time it for the carry’s damage window instead of casting on cooldown out of habit.
- Skill “Samsara, Locked” dumps a large single-target multiplier into one elite—this is the spend that keeps the rotation honest.
- Talent “Sanction” When an ally uses a Basic ATK—ignore it and Hanya plays like a worse generic Harmony unit.
- Technique “Netherworld Judgment” opens by hitting the pack on pull-in—use it before every MoC wave, not only in the overworld.
Weaknesses
- Buff windows on “Ten-Lords' Decree, All Shall Obey” are short—casting them when the carry cannot attack wastes the CRIT DMG/ATK amp for a full cycle.
- Hanya’s Skill is often the expensive part of the rotation; SP-negative teams force Basic ATKs and you lose the advance/amp that made the unit worth playing.
- As a 4★ Harmony unit, Hanya is easy to gear for early/mid game but usually loses the niche race to a modern limited option once that banner is built.
- Spamming “Samsara, Locked” every turn without watching Skill Points strands the rest of the team—Hanya is often the SP sink.
Trace Priority
Samsara, Locked carries most of the kit’s damage or utility—level this first.
Ten-Lords' Decree, All Shall Obey supports the main rotation—raise after the top priority traces.
Sanction supports the main rotation—raise after the top priority traces.
Oracle Brush is last priority outside of filling trace materials.
Stat Priority
Open with Technique if it helps, spend Skill to advance the kit’s resource, and hold Ultimate for the damage or buff window. Exact teammate order lands in Phase 2.
Open supports first, then spend the carry’s Skill/Ult inside the buff window. Exact order varies by the team tab above.
Light Cones
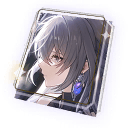
5★ · Path cone
Increases the wearer's Energy Regeneration Rate by 0.1% and regenerates 1 Skill Point when the wearer uses their Ultimate on an ally. This effect can be triggered once after every 2 uses of the wearer's Ultimate. When the wearer uses their Skill, the next ally taking action (except the wearer) deals 0.3% more DMG for 1 turn(s).
Why it works —Strong Harmony option for Hanya; use while farming or if signature is unavailable.

5★ · Path cone
Increases the wearer's CRIT DMG by 0.32%. At the start of the battle, the wearer gains Mask, lasting for 3 turn(s). While the wearer has Mask, the wearer's teammates have their CRIT Rate increased by 0.1% and their CRIT DMG increased by 0.28%. For every 1 Skill Point the wearer recovers (including Skill Points that exceed the limit), they gain 1 stack of Radiant Flame. And when the wearer has 4 stacks of Radiant Flame, all the stacks are removed, and they gain Mask, lasting for 4 turn(s).
Why it works —Flexible alternative on the same path—equip if you already own it at higher superimposition.
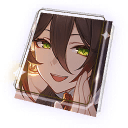
4★ · Path cone
At the start of the battle and whenever the wearer's turn begins, one of the following effects is applied randomly: All allies' ATK increases by 0.1%, all allies' CRIT DMG increases by 0.12%, or all allies' Energy Regeneration Rate increases by 0.06%. The applied effect cannot be identical to the last effect applied, and will replace the previous effect. The applied effect will be removed when the wearer has been knocked down. Effects of the same type cannot be stacked.
Why it works —Best accessible option for most accounts—raise superimposition when copies drop.
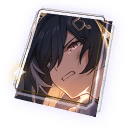
4★ · Path cone
When the wearer uses their Skill, the next ally taking action (except the wearer) deals 0.16% increased DMG for 1 turn(s).
Why it works —Budget path cone—fine while building the account.
Relics


Team Compositions
Primary hypercarry team for Hanya. Imbibitor Lunae, Qingque, Huohuo are the partners the kit / endgame clears assume first.
Enabler / amp piece this page is built around — keep their buffs or debuffs online every cycle.
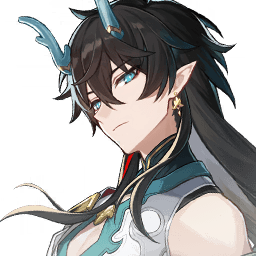
Imbibitor Lunae is the damage seat in this shell — build the supports around their rotation, not the reverse.

Qingque is the damage seat in this shell — build the supports around their rotation, not the reverse.

Huohuo covers healing (and often Energy / cleanse) so the carry can stay on-curve.
Traces & Eidolons
Traces
Deals Physical DMG equal to 140% of Hanya's ATK to one designated enemy.
Deals Physical DMG equal to 300% of Hanya's ATK to one designated enemy target, then applies "Burden" to them. For every 2 Basic ATKs, Skills, or Ultimates allies use on an enemy with "Burden," allies will immediately recover 1 Skill Point. "Burden" is only active on the latest target it is applied to, and will be dispelled automatically after the Skill Point recovery effect has been triggered 2 times.
Increases the SPD of a target ally by 22.5% of Hanya's SPD and increases the same target ally's ATK by 72%, lasting for 2 turn(s).
When an ally uses a Basic ATK, Skill, or Ultimate on an enemy inflicted with Burden, the DMG dealt increases by 38%, lasting for 2 turn(s).
Immediately attacks the enemy. After entering battle, applies Burden equivalent to that applied by the Skill to a random enemy.
Eidolons
When an ally target with Hanya's Ultimate effect defeats an enemy, Hanya's action advances by 15%. This effect can only be triggered 1 time(s) per turn.
Is it worth getting?
Small 4★ bump: When an ally target with Hanya's Ultimate effect defeats an enemy, Hanya's action advances by 15%. Take dupes when they appear on rate-up; never the reason you pull the banner.
After using the Skill, this character's SPD increases by 20% for 1 turn(s).
Is it worth getting?
Stat-leaning E2: Flat combat-stat bump tied to a specific trigger. Clear damage, but it does not rewrite Hanya’s rotation the way a mechanic eidolon would.
Skill Lv. +2, up to a maximum of Lv. 15. Basic ATK Lv. +1, up to a maximum of Lv. 10.
Is it worth getting?
Skill + Basic ATK levels only (+2). Free if you roll into it; never spend currency aiming for E3.
The Ultimate's duration is additionally extended for 1 turn(s).
Is it worth getting?
Side-grade: The Ultimate's duration is additionally extended for 1 turn(s). Happy if it drops; not a planned stopping point.
Ultimate Lv. +2, up to a maximum of Lv. 15. Talent Lv. +2, up to a maximum of Lv. 15.
Is it worth getting?
Ultimate + Talent levels only (+2). Skip as a goal—grab it if you overshoot toward E6, never hard-pity for it.
Increase the DMG Boost effect of the Talent by an additional 10%.
Is it worth getting?
Whale ceiling: Increase the DMG Boost effect of the Talent by an additional 10%. Only chase if Hanya is your dedicated Harmony main and E0–E2 already feel finished.
Hanya is fully usable at E0. Dedicated mains often stop at E0 before chasing higher. First stop: E0. Endgame target: E0.
Alternatives to Hanya
Not sure Hanya is right for you? Compare against similar characters to find your best pull.

You need a Fire Harmony unit and Asta's kit matches your account gap.

You need a Wind Harmony unit and Bronya's kit matches your account gap.

You need a Wind Harmony unit and Cerydra's kit matches your account gap.

You need a Physical Harmony unit and Robin's kit matches your account gap.

You need a Ice Harmony unit and Ruan Mei's kit matches your account gap.
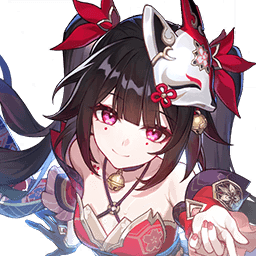
You need a Quantum Harmony unit and Sparkle's kit matches your account gap.
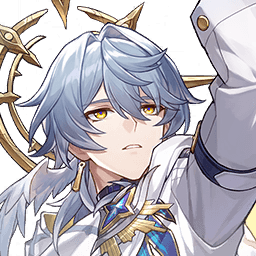
You need a Imaginary Harmony unit and Sunday's kit matches your account gap.
You need a Lightning Harmony unit and Tingyun's kit matches your account gap.

You need a Imaginary Harmony unit and Trailblazer (Harmony)'s kit matches your account gap.

You need a Quantum Harmony unit and Tribbie's kit matches your account gap.
You need a Imaginary Harmony unit and Yukong's kit matches your account gap.