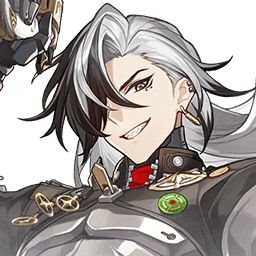
Boothill
Situational—Boothill shreds single-target Break. Ultimate “Dust Devil's Sunset Rodeo” implants element Weakness so Break stays online off-element. Best with Fugue / Ruan Mei / Bronya / The Dahlia. Hunt Break; weak in Pure Fiction AoE. Skip when you need PF coverage more than AS/MoC Break.
Boothill is a 5★ Physical The Hunt Break DPS. Skill “Sizzlin' Tango” is the primary in-combat spend. Ultimate “Dust Devil's Sunset Rodeo” is the payoff window for damage or team utility. This Phase 1 page covers kit text, gear targets, and pull notes—team comps stay empty until Phase 2.
Overview
Quick Build
Light Cone
Sailing Towards a Second Life
Signature BiS when owned.
Relic Set
Scholar Lost in Erudition (4pc) + Firmament Frontline: Glamoth (2pc)
Standard The Hunt relic direction for Boothill.
Body
CRIT Rate%
Main stat
Feet
ATK%
Main stat
Sphere / Rope
Physical DMG% · ATK%
Substats
CRIT Rate ≥ CRIT DMG > ATK% > SPD
Strengths
- “Dust Devil's Sunset Rodeo” dumps a huge single-target Physical multiplier into one elite—boss and Apocalyptic Shadow checks are where this Ultimate earns its trace levels.
- Skill “Sizzlin' Tango” dumps a large single-target multiplier into one elite—this is the spend that keeps the rotation honest.
- Talent “Five Peas in a Pod” Each stack of Pocket Trickshot increases the Enhanced Basic Attack's Toughness Reduction by 50%—miss the stack conditions and the burst window feels empty.
- Boothill can implant or force Physical-relevant Weakness from the kit itself—Break and Toughness routes stay online even when the MoC line-up did not list Physical.
Weaknesses
- “Dust Devil's Sunset Rodeo” is single-target—multi-wave Pure Fiction asks the rest of the team to clear trash while Boothill focuses the elite.
- E0 without “Sailing Towards a Second Life” is still clearable, but the gap versus a signature copy is larger than a single eidolon for most The Hunt carries—plan the cone before deep eidolon hunting.
- Boothill wants Break Effect supports and Toughness bars that can actually be broken; into awkward weakness line-ups the Complete Combustion / Break loop loses most of its damage.
- Spamming “Sizzlin' Tango” every turn without watching Skill Points strands the rest of the team—Boothill is often the SP sink.
Trace Priority
Dust Devil's Sunset Rodeo carries most of the kit’s damage or utility—level this first.
Sizzlin' Tango supports the main rotation—raise after the top priority traces.
Five Peas in a Pod supports the main rotation—raise after the top priority traces.
Skullcrush Spurs is last priority outside of filling trace materials.
Stat Priority
Open with Technique if it helps, spend Skill to advance the kit’s resource, and hold Ultimate for the damage or buff window. Exact teammate order lands in Phase 2.
Open supports first, then spend the carry’s Skill/Ult inside the buff window. Exact order varies by the team tab above.
Light Cones

5★ · Path cone
Increases the wearer's Break Effect by 0.6%. The Break DMG dealt by the wearer ignores 0.2% of the target's DEF. When the wearer's Break Effect in battle is at 1.5% or greater, increases their SPD by 0.12%.
Why it works —Signature / best-in-slot when owned—passive lines up with Boothill’s kit triggers.

5★ · Path cone
Increases the wearer's CRIT Rate by 0.08%, and increases their CRIT Rate against enemies with HP percentage 0.5% or less by an extra 0.08%. When the wearer defeats an enemy, their ATK is increased by 0.2% for 2 turn(s).
Why it works —Best accessible option for most accounts—raise superimposition when copies drop.

4★ · Path cone
For each time the wearer hits the same target, DMG dealt increases by 0.08%, stacking up to 5 time(s). This effect will be dispelled when the wearer changes targets.
Why it works —Budget path cone—fine while building the account.

4★ · Path cone
Increases the wearer's ATK by 0.16%. If there are 2 or fewer enemies on the field, increases wearer's CRIT Rate by 0.12%.
Why it works —Budget path cone—fine while building the account.
Relics



Team Compositions
Primary Break / Toughness team for Boothill. Fugue, Ruan Mei, Lingsha are the partners the kit / endgame clears assume first.
Core carry for this shell — owns the damage plan and sets the rotation pace.

Fugue enables Super Break / Toughness pressure rather than a generic CRIT Harmony slot.

Ruan Mei amps Break Effect / action value so Toughness bars die on schedule.

Lingsha keeps Toughness routes alive with heals (and Break-friendly sustain when built that way).
Traces & Eidolons
Traces
Deals Physical DMG equal to 140% of Boothill's ATK to one designated enemy target.
Forces Boothill and one designated enemy target into the "Standoff" state. Boothill's Basic ATK gets Enhanced, and he cannot use his Skill, lasting for 2 turn(s). This duration decreases by 1 at the start of Boothill's every turn. The enemy target in the "Standoff" becomes Taunted. When this enemy target/Boothill gets attacked by the other party in the Standoff, the DMG they receive increases by 38%/15%. After this target is defeated or becomes Weakness Broken, Boothill gains 1 stack of "Pocket Trickshot," then dispels the "Standoff." This Skill cannot regenerate Energy. After using this Skill, the current turn does not end.
Applies Physical Weakness to one designated enemy target, lasting for 2 turn(s). Deals Physical DMG equal to 480% of Boothill's ATK to the target and delays their action by 45%.
Each stack of Pocket Trickshot increases the Enhanced Basic Attack's Toughness Reduction by 50%, stacking up to 3 time(s). If the target is Weakness Broken while the Enhanced Basic ATK is being used, based on the number of Pocket Trickshot stacks, deals Break DMG to this target equal to 88%/150%/213% of Boothill's Physical Break DMG. The max Toughness taken into account for this DMG cannot exceed 16 times the base Toughness Reduction of the Basic Attack "Skullcrush Spurs." After winning the battle, Boothill can retain Pocket Trickshot for the next battle.
After the Technique is used, when casting the Skill for the first time in the next battle, applies the same Physical Weakness to the target as the one induced by the Ultimate, lasting for 2 turn(s).
Deals Physical DMG equal to 308% of Boothill's ATK to one designated enemy target. The Enhanced Basic Attack cannot recover Skill Points and can only target the enemy that is in the "Standoff" state.
Eidolons
When the battle starts, obtains 1 stack of Pocket Trickshot. When Boothill deals DMG, ignores 16% of the enemy target's DEF.
Is it worth getting?
Comfort opener: Adds DEF ignore or shred on the enhanced hit. Nice QoL/damage, but E0 still runs the full kit—don’t break pity for E1 alone.
When in Standoff and gaining Pocket Trickshot, recovers 1 Skill Point(s) and increases Break Effect by 30%, lasting for 2 turn(s). Can also trigger this effect when gaining Pocket Trickshot stacks that exceed the max limit. But cannot trigger repeatedly within one turn.
Is it worth getting?
Kit add-on: When in Standoff and gaining Pocket Trickshot. Evaluate against your supports—pull only if that specific clause solves a problem you actually hit.
Ultimate Lv. +2, up to a maximum of Lv. 15. Basic ATK Lv. +1, up to a maximum of Lv. 10.
Is it worth getting?
Ultimate + Basic ATK levels only (+2). Free if you roll into it; never spend currency aiming for E3.
When the enemy target in the Standoff is attacked by Boothill, the DMG they receive additionally increases by 12%. When Boothill is attacked by the enemy target in the Standoff, the effect of him receiving increased DMG is offset by 12%.
Is it worth getting?
Side-grade: When the enemy target in the Standoff is attacked by Boothill, the DMG they receive additionally increases by 12%. Happy if it drops; not a planned stopping point.
Skill Lv. +2, up to a maximum of Lv. 15. Talent Lv. +2, up to a maximum of Lv. 15.
Is it worth getting?
Skill + Talent levels only (+2). Skip as a goal—grab it if you overshoot toward E6, never hard-pity for it.
When triggering the Talent's Break DMG, additionally deals Break DMG to the target equal to 40% of the original DMG multiplier and additionally deals Break DMG to adjacent targets equal to 70% of the original DMG multiplier.
Is it worth getting?
Whale ceiling: When triggering the Talent's Break DMG. Only chase if Boothill is your dedicated The Hunt main and E0–E2 already feel finished.
Boothill is fully usable at E0. Dedicated mains often stop at E0 before chasing higher. First stop: E0. Endgame target: E0.
Alternatives to Boothill
Not sure Boothill is right for you? Compare against similar characters to find your best pull.

You need a Quantum The Hunt unit and Archer's kit matches your account gap.

You need a Lightning The Hunt unit and Ashveil's kit matches your account gap.
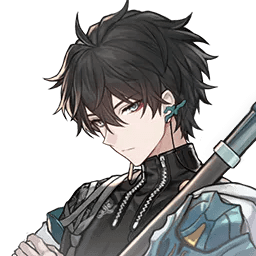
You need a Wind The Hunt unit and Dan Heng's kit matches your account gap.

You need a Imaginary The Hunt unit and Dr. Ratio's kit matches your account gap.

You need a Wind The Hunt unit and Feixiao's kit matches your account gap.

You need a Imaginary The Hunt unit and March 7th's kit matches your account gap.

You need a Lightning The Hunt unit and Moze's kit matches your account gap.

You need a Quantum The Hunt unit and Seele's kit matches your account gap.

You need a Physical The Hunt unit and Sushang's kit matches your account gap.

You need a Fire The Hunt unit and Topaz & Numby's kit matches your account gap.

You need a Ice The Hunt unit and Yanqing's kit matches your account gap.